

Imagine this: you’re in the middle of a home improvement project when you encounter a stripped screw. This common issue can halt your progress and potentially damage your materials. But don’t worry! In this blog, we’ll share 6 proven techniques to efficiently remove stripped screws, saving you time and ensuring the quality of your work. We’ve got you covered from simple hacks using household items to specialized tools. Let’s dive in and conquer this common DIY dilemma.
1. Using a Rubber Band
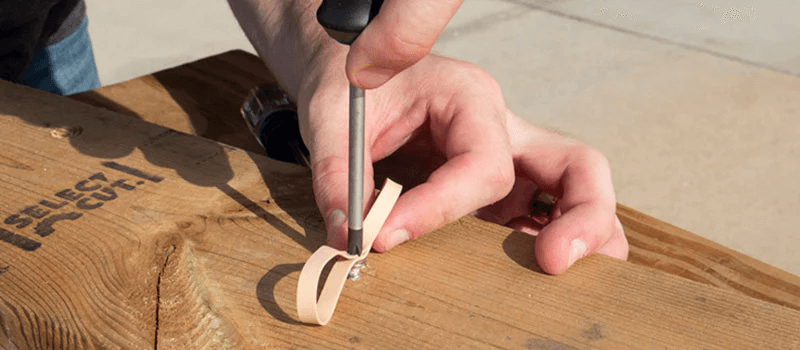
A rubber band can be a surprisingly effective tool for removing a stripped screw. The elasticity and texture of the rubber band create additional friction between the screwdriver and the screw head, providing the extra grip needed to turn the screw. This simple yet clever trick can often save you from a lot of frustration.
Step-by-Step Guide
-
Choose the Right Rubber Band: Select a wide, flat rubber band. Thicker bands tend to work better as they cover more surface area and provide more grip.
-
Place the Rubber Band Over the Screw Head: Lay the rubber band flat over the stripped screw head, ensuring it covers the entire surface.
-
Position the Screwdriver: Firmly press the screwdriver into the rubber band and the screw head. Make sure the screwdriver is correctly aligned with the screw to avoid further stripping.
-
Turn the Screw: Apply steady, firm pressure as you slowly turn the screwdriver. The rubber band should grip the screw head, allowing you to turn it and remove the screw.
-
Remove the Screw: Once the screw starts to turn, continue applying pressure and turn until the screw is completely removed.
Pros and Cons
Pros:
-
Quick and Easy: This method is simple and can be done with items you likely already have at home.
-
Minimal Damage: This technique is gentle on both the screw and the surrounding material, reducing the risk of further damage.
Cons:
-
Temporary Fix: While effective, this method may not work for every situation, especially if the screw is rusted or firmly lodged.
-
Requires Proper Alignment: The success of this technique depends on correctly aligning the screwdriver with the screw head and maintaining steady pressure.
Using a rubber band is a handy and accessible trick that can often get you out of a bind when dealing with stripped screws. However, for more stubborn screws, you might need to explore other techniques. Stay tuned as we continue to uncover more effective methods to tackle stripped screws in your home improvement projects!
2. Employing a Screw Extractor Kit
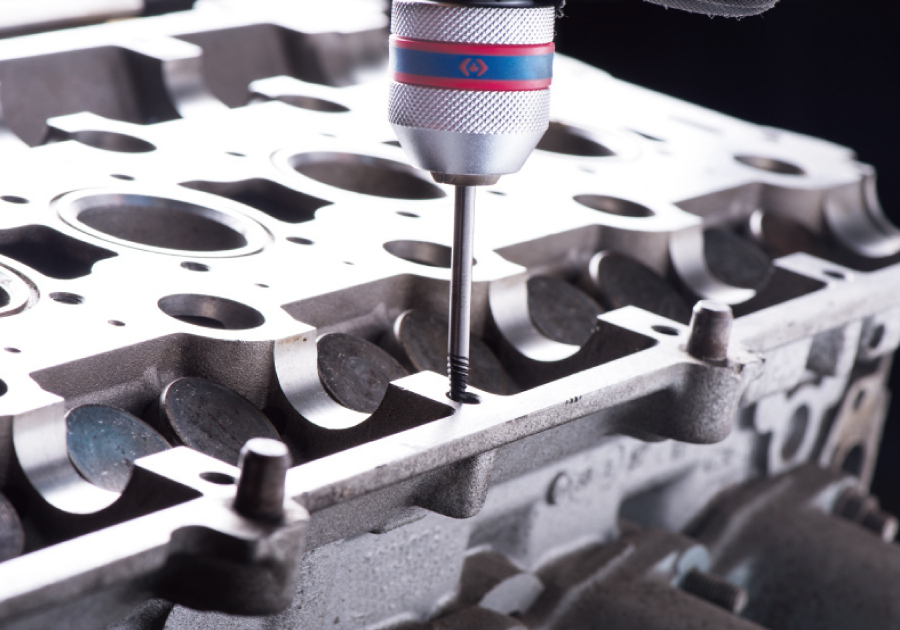
A screw extractor kit is a specialized tool designed specifically for removing stripped or damaged screws. It typically consists of a drill bit and an extractor bit. The drill bit is used to create a small hole in the center of the stripped screw, while the extractor bit grips onto the screw and allows you to turn it out.
Step-by-Step Guide
-
Drill a Pilot Hole: Use the appropriate-sized drill bit from the screw extractor kit to drill a small pilot hole into the center of the stripped screw head. Be sure to drill straight and centered to avoid damaging the surrounding material.
-
Insert the Extractor Bit: Select the extractor bit that matches the size of the pilot hole you drilled. Insert the extractor bit into the pilot hole, ensuring it fits securely.
-
Turn Counterclockwise: With the extractor bit firmly in place, use a wrench or screwdriver to turn it counterclockwise. The extractor bit will grip onto the stripped screw and gradually loosen it.
-
Remove the Screw: Continue turning the extractor bit until the stripped screw is completely removed from the material.
Pros and Cons
Pros:
-
Effective Removal: Screw extractor kits are specifically designed for removing stripped screws and are often very effective, even with severely damaged screws.
-
Reusable: Once you have a screw extractor kit, you can use it multiple times for different projects, making it a valuable investment for DIY enthusiasts.
Cons:
-
Requires Skill and Precision: Using a screw extractor kit requires careful drilling and precise alignment to avoid damaging the material or breaking off the screw.
-
May Not Work for All Screws: While effective for many situations, screw extractor kits may not be suitable for every type of screw or every degree of stripping.
-
Potential for Breakage: If the screw is extremely stuck or the material is very hard, there is a risk of the extractor bit breaking off inside the screw, which can complicate the removal process.
Employing a screw extractor kit can be a reliable solution for removing stubborn, stripped screws, but it’s essential to use it with care and precision to avoid further complications.
3. Applying a Dremel Tool
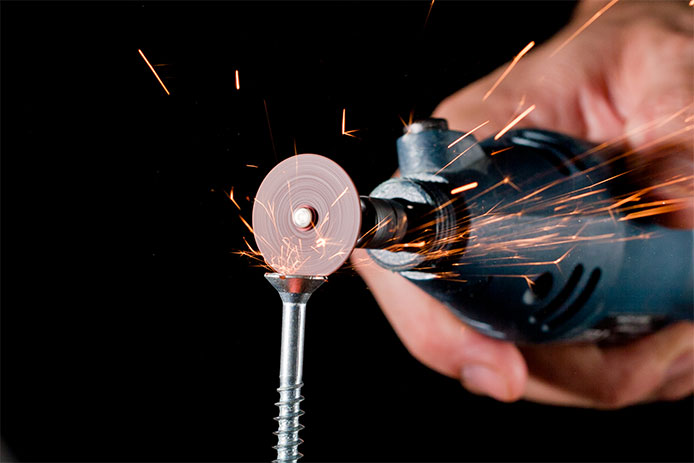
A Dremel tool, a versatile rotary tool, can be used to create a new slot in the head of a stripped screw. By cutting a new, clean slot, you can then use a flathead screwdriver to remove the screw. This method provides precision and control, making it an effective solution for screws that are too damaged for other techniques.
Step-by-Step Guide
-
Prepare the Dremel Tool: Equip your Dremel tool with a cutting wheel attachment. Make sure to wear safety goggles and gloves to protect yourself from metal shards and debris.
-
Position the Dremel Tool: Secure the material with the stripped screw, ensuring it is stable and won’t move during the cutting process. Position the Dremel tool at a 90-degree angle to the screw head.
-
Cut a New Slot: Carefully turn on the Dremel tool and gently cut a straight slot across the screw head. The slot should be deep enough to allow a flathead screwdriver to gain a solid grip but not too deep to damage the surrounding material.
-
Remove the Screw: Once the new slot is cut, insert a flathead screwdriver into the slot. Apply firm pressure and turn the screwdriver counterclockwise to remove the screw.
Pros and Cons
Pros:
-
Precision: The Dremel tool allows for precise cutting, making it easier to create an effective slot without damaging the material around the screw.
-
Control: You have significant control over the depth and width of the slot, ensuring a good fit for the flathead screwdriver.
-
Versatility: A Dremel tool is a versatile piece of equipment that can be used for various other DIY tasks and projects, making it a valuable addition to your toolkit.
Cons:
-
Requires Steady Hands: Using a Dremel tool requires a steady hand and good control to avoid slipping and potentially damaging the material or injuring yourself.
-
Risk of Overheating: Prolonged use of the Dremel tool can generate heat, which might affect the screw or the material around it. Take breaks to prevent overheating.
Using a Dremel tool to create a new slot in a stripped screw head is a precise and controlled method that can save your home improvement project from a frustrating setback. However, it requires care and attention to detail to execute properly.
4. Utilizing Pliers or Vice Grips
Pliers or vice grips can be highly effective tools for manually turning and removing a stripped screw. These tools provide a strong grip on the screw head, allowing you to apply the necessary torque to loosen and remove it. This method is particularly useful when the screw head is exposed and accessible.
Step-by-Step Guide
-
Choose the Right Tool: Select a pair of pliers or vice grips that can firmly grip the screw head. Vice grips are often more effective due to their locking mechanism.
-
Adjust the Grip: Open the jaws of the pliers or vice grips wide enough to fit around the screw head. Adjust the grip to ensure a tight hold on the screw. For vice grips, use the adjustment screw to lock the tool securely in place.
-
Grip the Screw: Position the tool around the screw head, making sure it is as close to the base of the screw head as possible for maximum leverage.
-
Turn the Screw: Apply steady pressure and turn the pliers or vice grips counterclockwise. If the screw is very tight, you may need to gently rock it back and forth to loosen it before fully turning it out.
Pros and Cons
Pros:
-
Strong Grip: Pliers and vice grips provide a strong and secure grip, which is essential for turning stripped screws that lack proper slots.
-
Manual Control: This method gives you direct control over the amount of pressure and torque applied, reducing the risk of further stripping the screw.
Cons:
-
Limited to Accessible Screws: This method is only effective if there is enough screw head exposed for the tool to grip. It won’t work for screws that are recessed or have broken heads.
-
Potential Damage to Material: Applying too much pressure or an improper grip can damage the surrounding material, especially if it’s soft or delicate.
-
Manual Effort Required: This technique requires physical effort, which can be tiring if you’re dealing with multiple screws or very tight screws.
Utilizing pliers or vice grips is a straightforward and effective method for removing stripped screws, particularly when the screw head is easily accessible. With the right technique and tools, you can quickly resolve the issue and continue with your home improvement project.
5. Hammering a Screwdriver
When dealing with a stripped screw, one effective method to gain a better grip is to use a hammer to tap a screwdriver into the screw head. This can create new indentations or deepen existing ones, allowing the screwdriver to grip the screw head more securely. This technique is particularly useful when the screw head is not completely stripped but still offers some resistance.
Step-by-Step Guide
-
Choose the Right Screwdriver: Select a screwdriver that fits snugly into the existing screw head slots. A flathead screwdriver is often the best choice for this method.
-
Position the Screwdriver: Place the tip of the screwdriver into the screw head, ensuring it is properly aligned and centered.
-
Tap the Screwdriver with a Hammer: Using a hammer, gently tap the handle of the screwdriver. Start with light taps to avoid damaging the screw or the surrounding material. The goal is to drive the screwdriver deeper into the screw head to create a more secure grip.
-
Turn the Screw: Once the screwdriver is firmly embedded in the screw head, apply steady pressure and turn the screwdriver counterclockwise to remove the screw. If it doesn’t budge initially, try tapping the screwdriver a few more times and attempt to turn it again.
Pros and Cons
Pros:
-
Improved Grip: Hammering the screwdriver can create a new or deeper slot in the screw head, providing a better grip and making it easier to turn the screw.
-
Minimal Tools Required: This method only requires a hammer and a screwdriver, both of which are common household tools.
-
Quick and Simple: It’s a straightforward technique that can often resolve the issue quickly without needing specialized tools.
Cons:
-
Limited Effectiveness: This method is most effective on screws that still have some remaining slots or indentations. Completely stripped or deeply embedded screws may not respond well to this technique.
-
Physical Effort: Requires manual effort and precision, which can be challenging if the screw is in a difficult-to-reach location.
-
Safety Concerns: There is a potential risk of injury if the hammer or screwdriver slips. Always ensure you have a firm grip and are working in a controlled manner.
Hammering a screwdriver into a stripped screw head can provide the extra grip needed to remove a stubborn screw, but it requires careful execution to avoid further complications. This method is a practical and accessible solution for many common DIY situations.
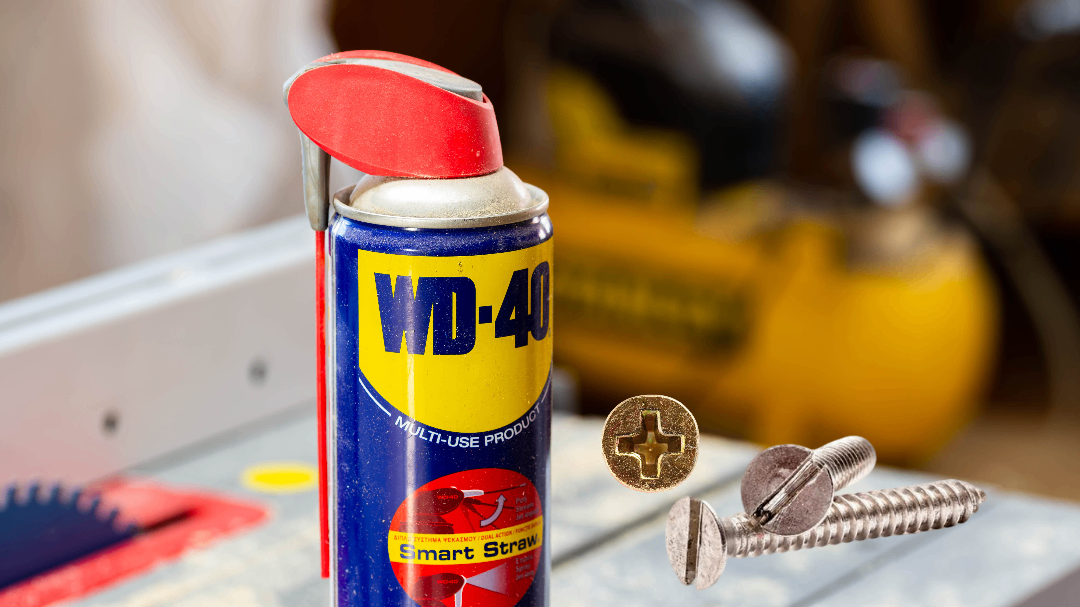
6. Chemical Solutions
Chemical solutions can be highly effective in loosening screws that are stuck due to rust, corrosion, or grime. Penetrating oils and other chemical products are designed to seep into the threads of a screw, breaking down rust and lubricating the area to make it easier to turn the screw out. These solutions can save significant time and effort, especially in outdoor or older projects where screws may be severely corroded.
Step-by-Step Guide
-
Select the Right Product: Choose a penetrating oil or chemical solution designed for loosening screws. Popular products include WD-40, Liquid Wrench, and PB Blaster.
-
Apply the Solution: Spray or apply the chemical solution directly onto the screw head and the surrounding area. Make sure to cover as many threads as possible.
-
Allow Time to Penetrate: Let the solution sit for the recommended amount of time (usually 5-10 minutes). This allows the chemical to penetrate and break down the rust or debris.
-
Remove the Screw: After the solution has had time to work, use a screwdriver or pliers to turn the screw counterclockwise. If the screw is still difficult to turn, reapply the solution and wait a bit longer before attempting again.
Pros and Cons
Pros:
-
Highly Effective: Chemical solutions are very effective at breaking down rust and loosening screws that are otherwise difficult to remove.
-
Minimal Physical Effort: This method requires less manual effort compared to other techniques, as the chemicals do most of the work.
-
Preventative Maintenance: Using penetrating oils can also help prevent future rust and corrosion, making it easier to remove screws later on.
Cons:
-
Chemical Hazards: These products can be hazardous if not used properly. They often contain strong chemicals that can be harmful if inhaled, ingested, or if they come into contact with skin or eyes. Always use in a well-ventilated area and wear protective gear.
-
Environmental Impact: Some chemical solutions can be harmful to the environment. It’s important to use them responsibly and dispose of them properly.
-
Cost: Purchasing specialized chemical products can be an additional expense, especially if you only need to use them occasionally.
-
Time-Consuming: While effective, this method can be slower than others because it requires time for the chemical to penetrate and work.
Using chemical solutions is a powerful method for loosening stubborn screws, especially those affected by rust or corrosion. With the right product and proper application, you can often remove even the most challenging screws with ease. However, handling these chemicals carefully is important to ensure safety and effectiveness.
Final Thoughts
In this blog, we’ve explored six proven techniques to help you tackle the common problem of stripped screws during your home improvement projects. From simple tricks like using a rubber band to more advanced methods like employing a screw extractor kit or applying chemical solutions, each technique offers unique benefits and is suited for different scenarios. Here’s a quick summary:
-
Using a Rubber Band: A quick and easy way to gain extra grip.
-
Employing a Screw Extractor Kit: A specialized tool for efficient removal.
-
Applying a Dremel Tool: Precision cutting to create a new slot.
-
Utilizing Pliers or Vice Grips: Manually turning the screw with a strong grip.
-
Hammering a Screwdriver: Tapping a screwdriver into the screw head for better grip.
-
Chemical Solutions: Using penetrating oils to loosen rusted or corroded screws.
To avoid stripping screws in the future, consider the following tips:
-
Use the Right Tools: Ensure you’re using the correct size and type of screwdriver for your screws.
-
Apply Steady Pressure: Use consistent, firm pressure when driving screws to prevent slipping.
-
Pre-Drill Holes: For harder materials, pre-drill pilot holes to make driving screws easier.
-
Maintain Tools: Keep your screwdrivers and drill bits in good condition, replacing them when they become worn or damaged.
-
Slow and Steady: Avoid using excessive speed with power tools, which can cause slipping and stripping.
Stripped screws are a common issue, but with the right techniques, you can easily overcome this obstacle and keep your project on track. Don’t be discouraged if you encounter a stripped screw; try these methods and see which one works best for your situation. Remember, every DIYer faces challenges, and learning how to handle them is part of the journey.
We’d love to hear from you! Share your own tips and experiences with removing stripped screws in the comments below. Don’t forget to subscribe to our blog for more DIY tips and tricks to make your home improvement projects successful.
Links to Tools and Kits
By equipping yourself with the right tools and knowledge, you’ll be well-prepared to tackle any DIY challenge that comes your way. Happy DIYing!
-
Screw Extractor Kit: IRWIN Screw Extractor Set
-
Dremel Tool: Dremel 3000-2/28 Rotary Tool Kit
-
Penetrating Oil: WD-40 Specialist Penetrant Spray
-
Pliers and Vice Grips: IRWIN VISE-GRIP Original Locking Pliers
-
Rubber Bands: Alliance Rubber Bands
-
Flathead Screwdrivers: Klein Tools 2-Piece Screwdriver Set
FAQs
-
How to unscrew a stripped screw?
There are several methods to unscrew a stripped screw. You can use a rubber band, pliers, a screw extractor, or even cut a new groove in the screw for removal. The method you choose depends on the tools you have at hand and the severity of the stripping.
-
What is the best tool to remove a stripped screw?
A screw extractor is often considered the best tool for this job. It’s designed specifically to remove screws that have had their heads stripped. The extractor is a drill bit that has a reverse thread. When you drill into the stripped screw, the extractor bit digs into the screw head and turns it out.
-
How to remove a stripped screw with duct tape?
Place a piece of duct tape over the stripped screw, ensuring that the tape is flat and fully covers the screw head. Press down firmly so the tape sticks to the screw head. Then, insert your screwdriver into the screw head, applying pressure through the tape, and try to turn the screw.
-
How do you remove a stripped screw without tools?
If you don’t have any tools, try using a rubber band. Place a wide rubber band over the stripped screw head. Then, while applying downward pressure, try to turn the screwdriver. The rubber band can provide the extra grip needed to turn the screw.